Installation instruction
Step 1: Download and unzip the Clockify Integration ZIP file. Link: ...
Step 2: In GitHub, click Upload files and add the Clockify file.
Make sure it is uploaded to the main branch.
Step 3: In Odoo Settings, enable Developer Mode.
Step 4: Go to Apps and click Update Apps List.
Step 5: Find and install Clockify Integration and the Projects module.
Step 6: In Settings, search for Clockify and fill in the required fields with the information from your Clockify app.
Make sure to copy the full API key.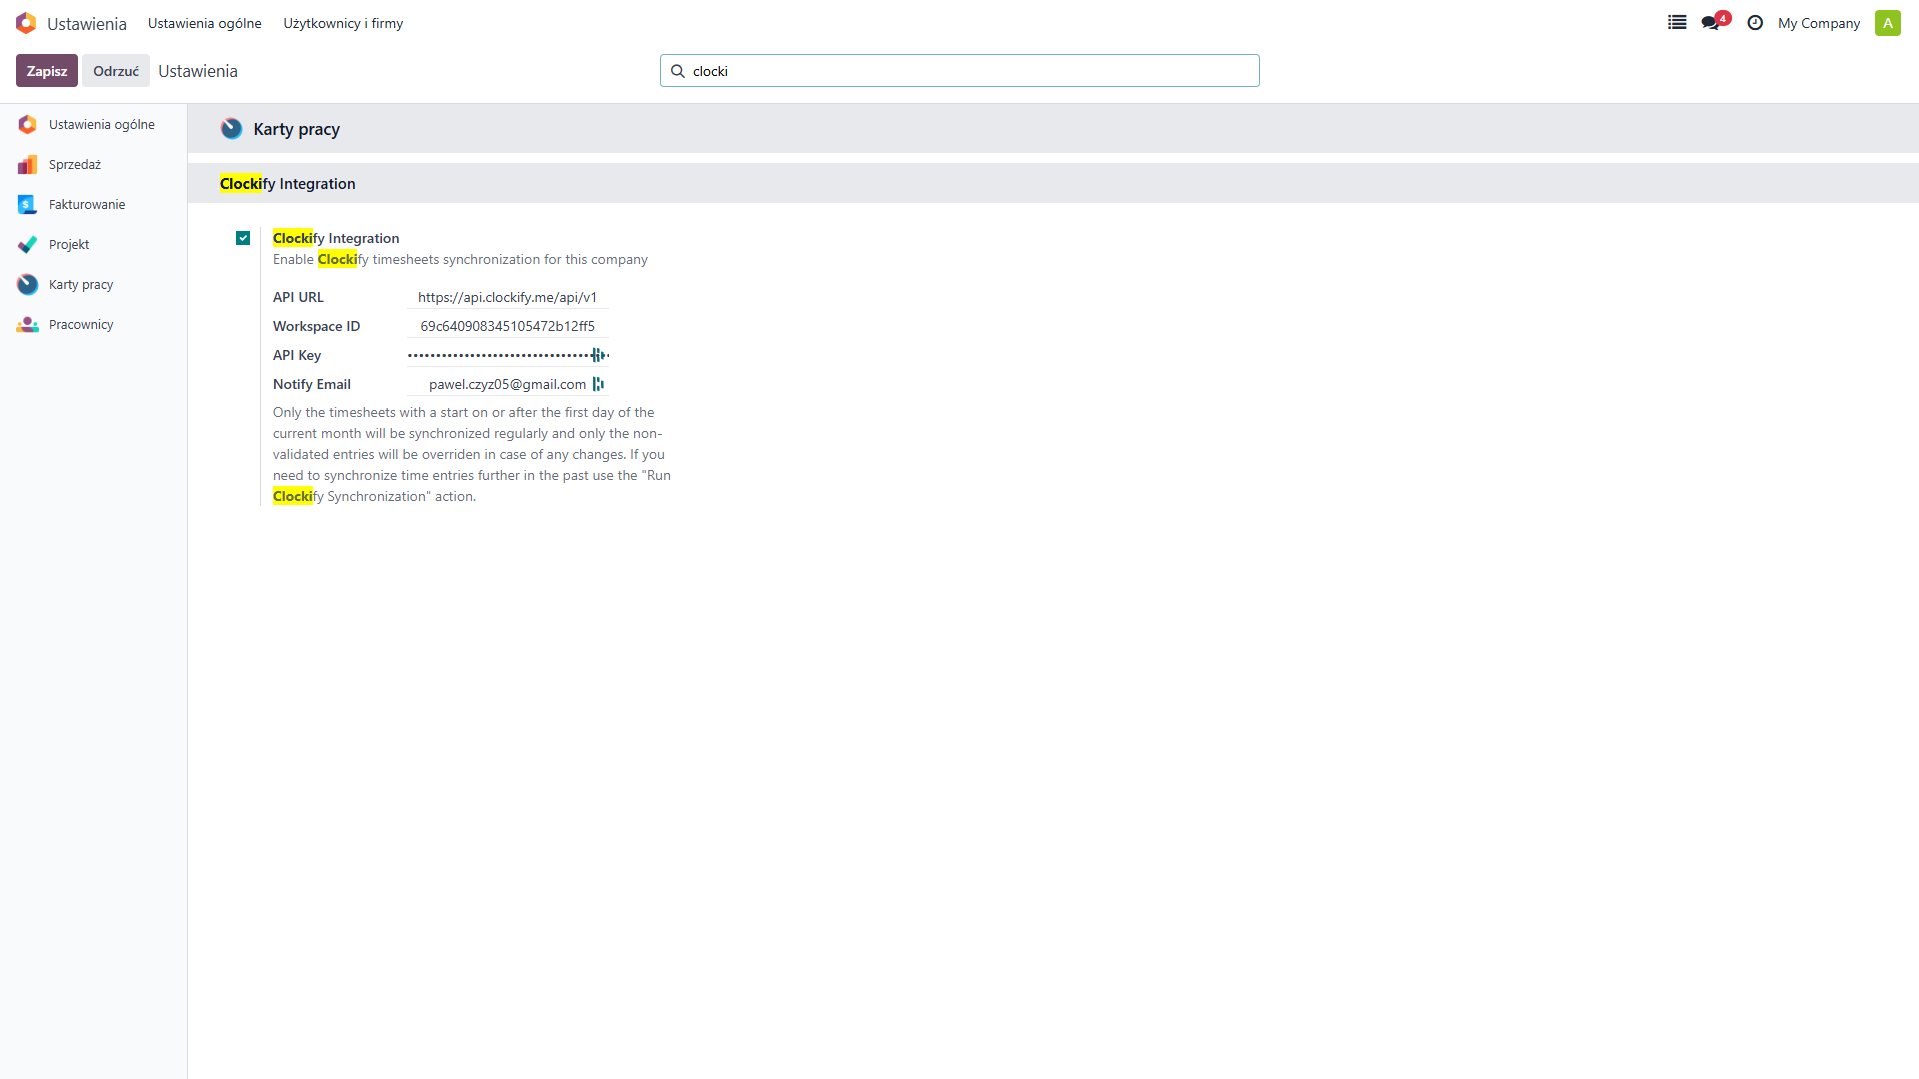
Step 7: Add the corresponding Clockify ID to each user in the Odoo user settings.
How to Use?
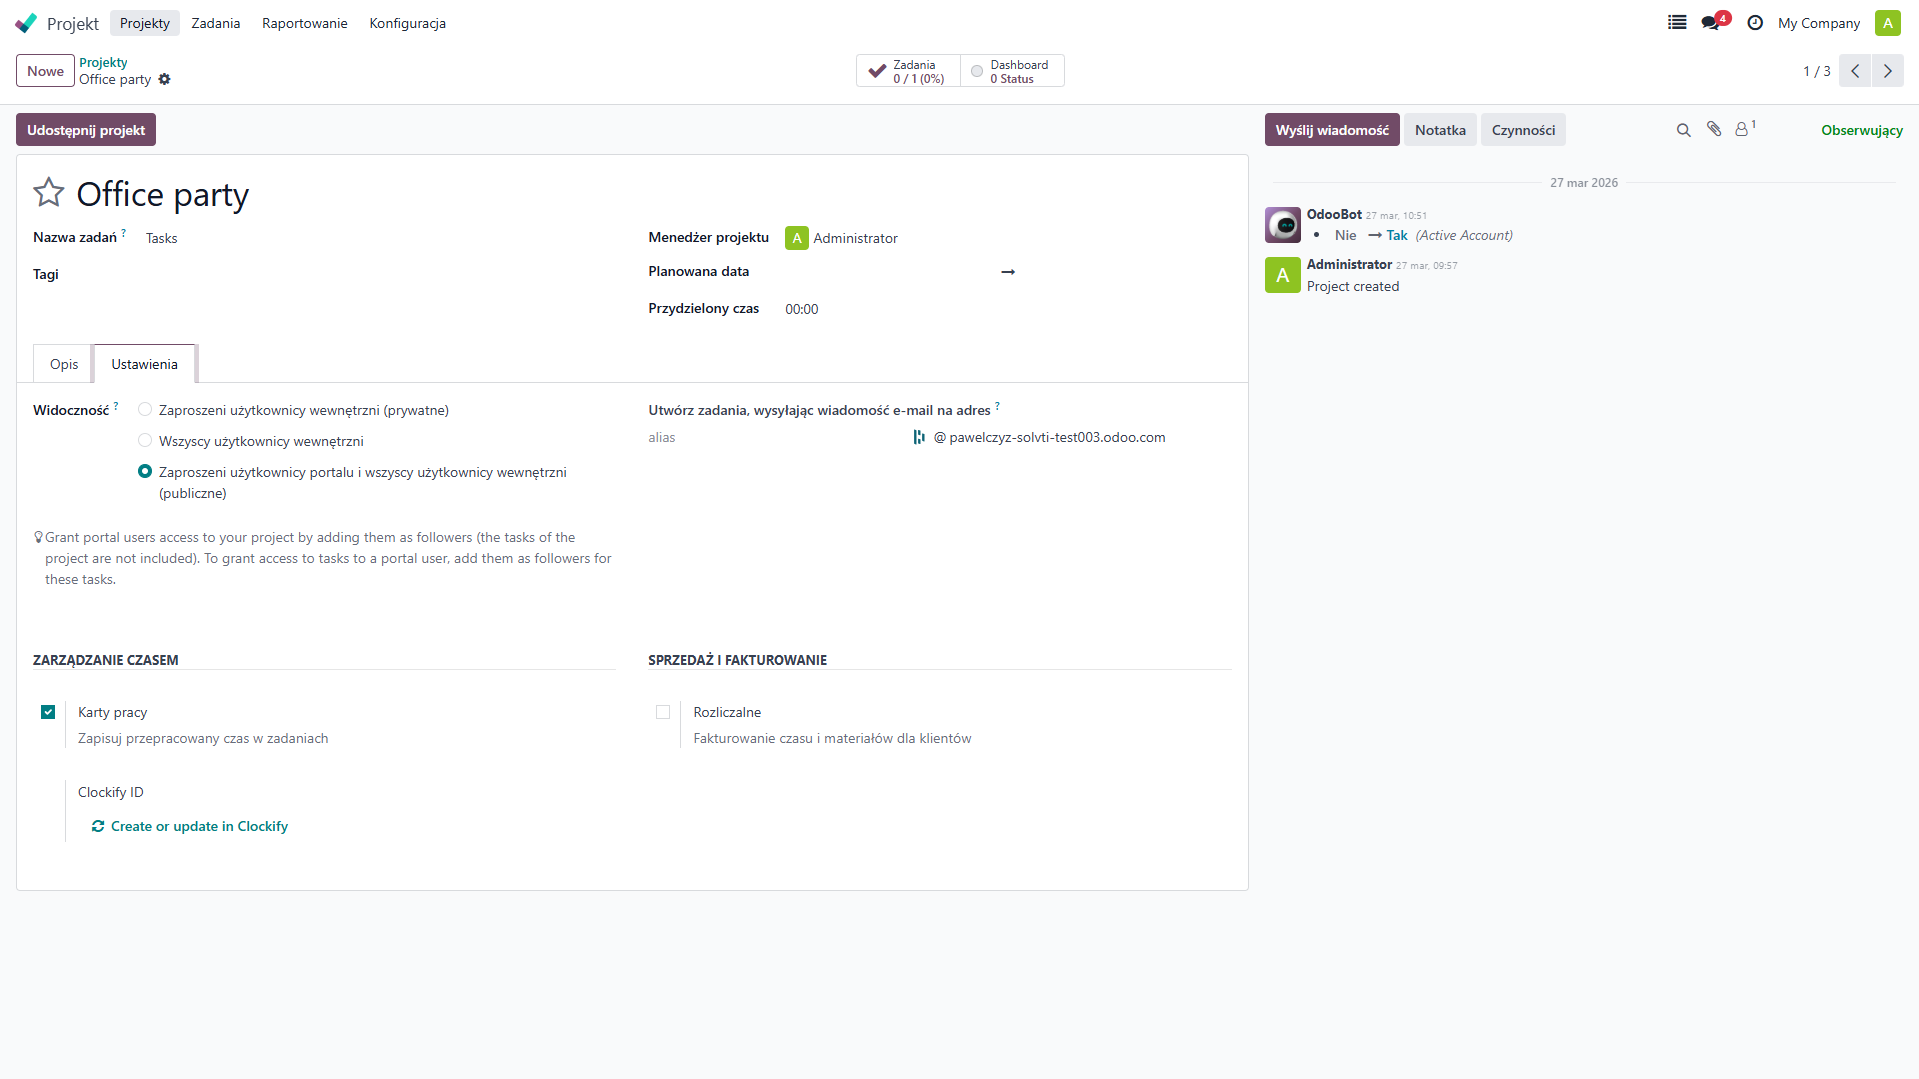
Step 1: Open the project settings and click Create or Update in Clockify.
This will automatically create the project in the Clockify app.
Step 2: Do the same for tasks. Create a task and click Create or Update in Clockify. This will automatically create the task under the correct project in the Clockify app.
Additional Information
If you change a task status in Odoo to Done and click Create or Update, the task status in Clockify will also change to Inactive. As a result, it will no longer be possible to track time for that task.