KSeF Module
🔐Authorization
To enable Odoo to send invoices to KSeF, you must create KSeF certificates and add them to your Odoo. The individual who holds the certificate will be recognized as the entity that submitted the invoice.
Step1. Go to KSeF application and log in.
Step 2. To generate a certificate, go to main manu and choose Certificates > Request a certificate.
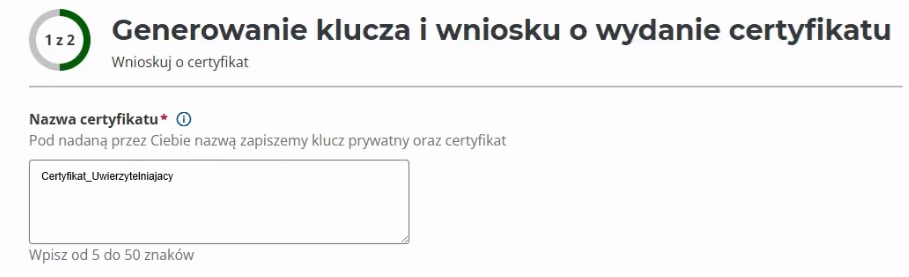
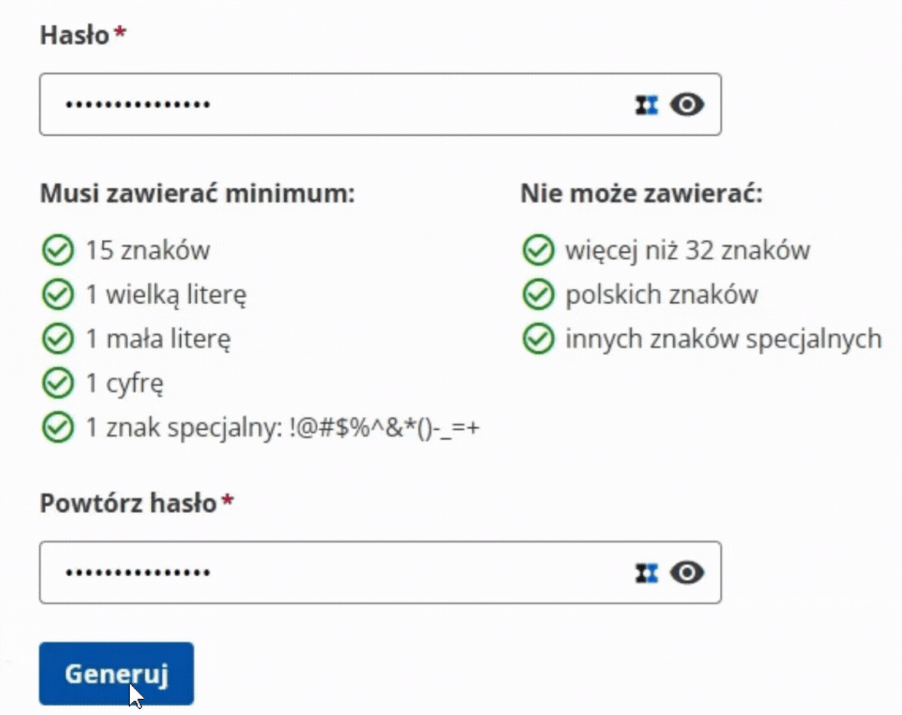
Step 3. On the first page of the form, you will need to enter the certificate name and password.
In the Certificate name field, enter the name under which the private key and certificate will be saved. We recommend choosing a name that will clearly indicate to whom the certificate belongs. In the case of managing several companies, it is worth naming each certificate in a way that clearly indicates the company it concerns. The name will be visible when searching for the certificate and saving the file.
In the Password field, define a password to protect the private key. Please note that passwords cannot be reset — save them and store them in a secure password manager.
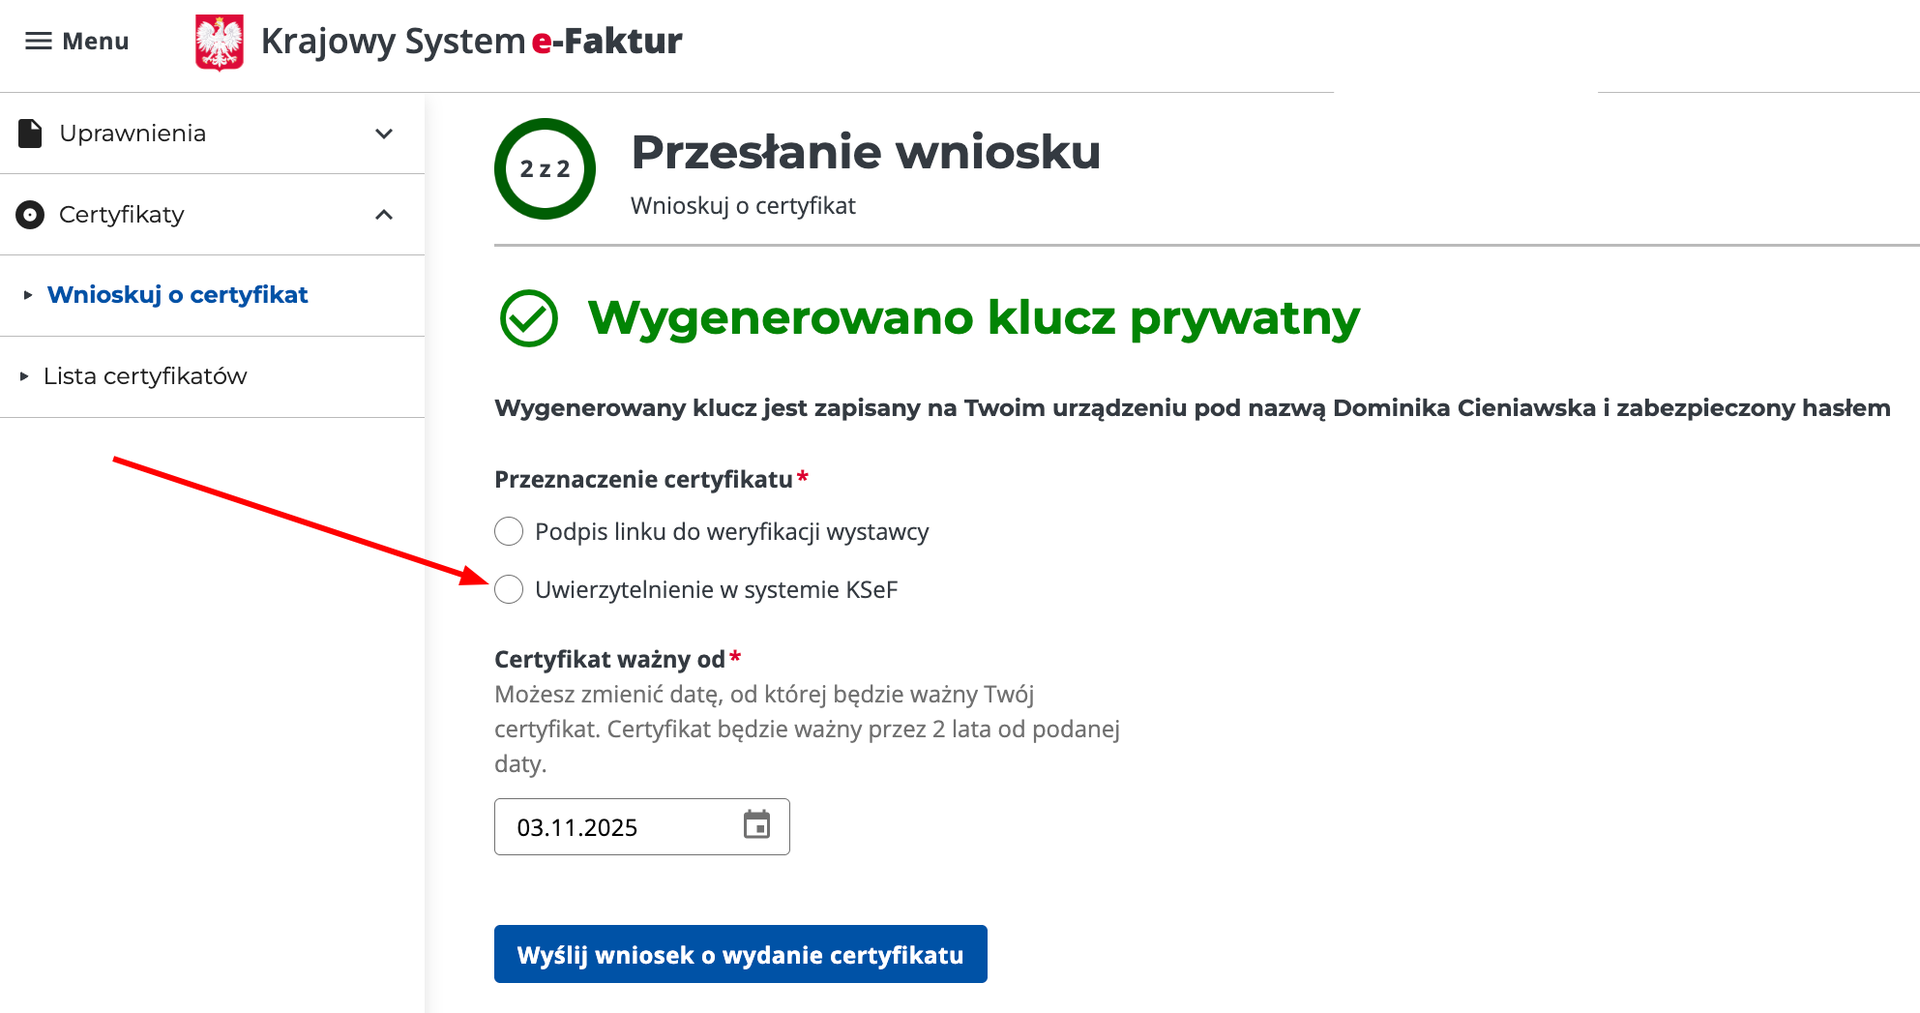
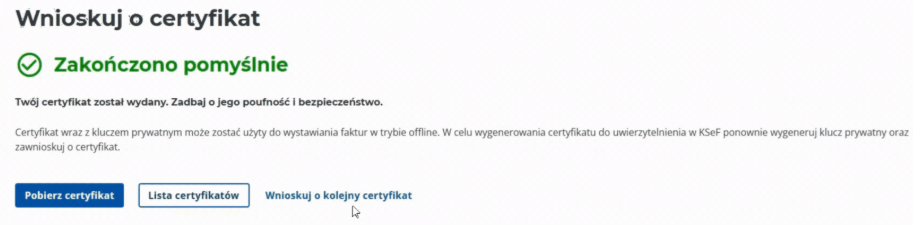
Step 4. Choose the certificate type as authorization for the KSeF system and submit the certificate issuance application — this will start the KSeF certificate issuance process. The process may take a few minutes. You can use the Refresh button to check the status.
Step 6. Go to Odoo and navigate to Settings > General Settings > Certificates and Keys.
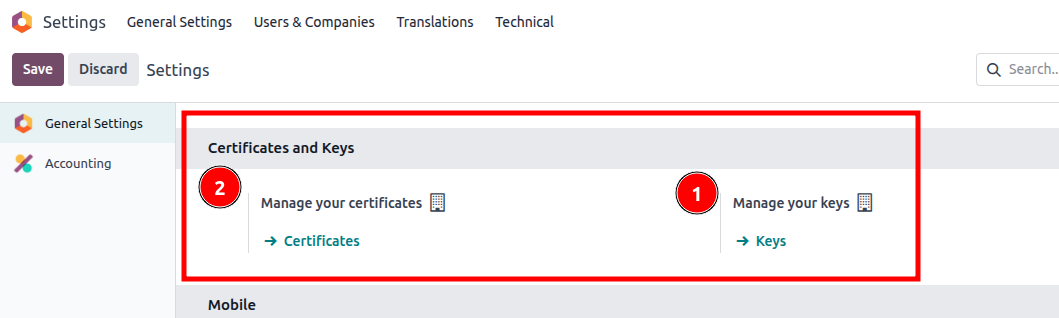
Step. 6.1. Create a new key in Odoo. Go to Manage your keys > Keys > New. In the field "Key file" select key file from KSeF and in the field "Private key password" provide password set in KSeF during certificate generation.

Step 6.2. Create a new certificate in Odoo. Go to Manage your certificates > Certificates > New. Give it a clear name indicating that it is KSeF certificate and upload a certificate file from KSeF. Do not provide password on the certificate; just select your Private Key created in step 6.1. 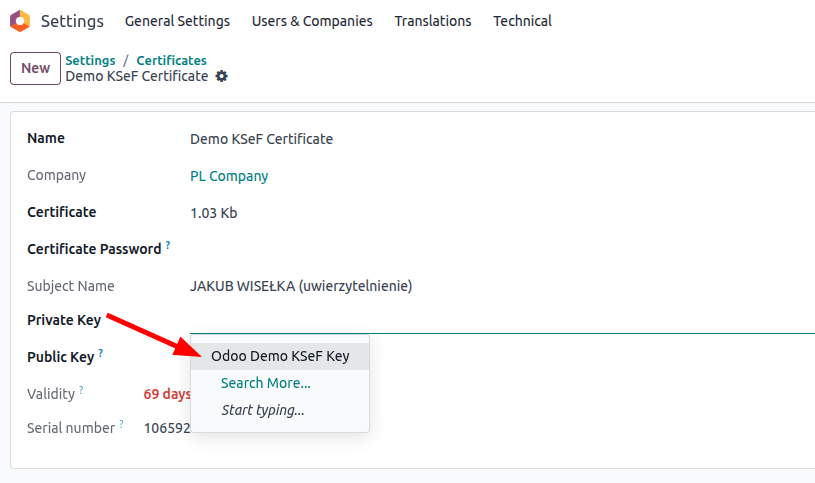
Step 7. Go to Settings > Accounting > Polish Localization > Allow KSeF integration. In the field KSeF Certificate choose your KSeF Certificate. If everything is set up correctly, Odoo can now transmit invoices to KSeF.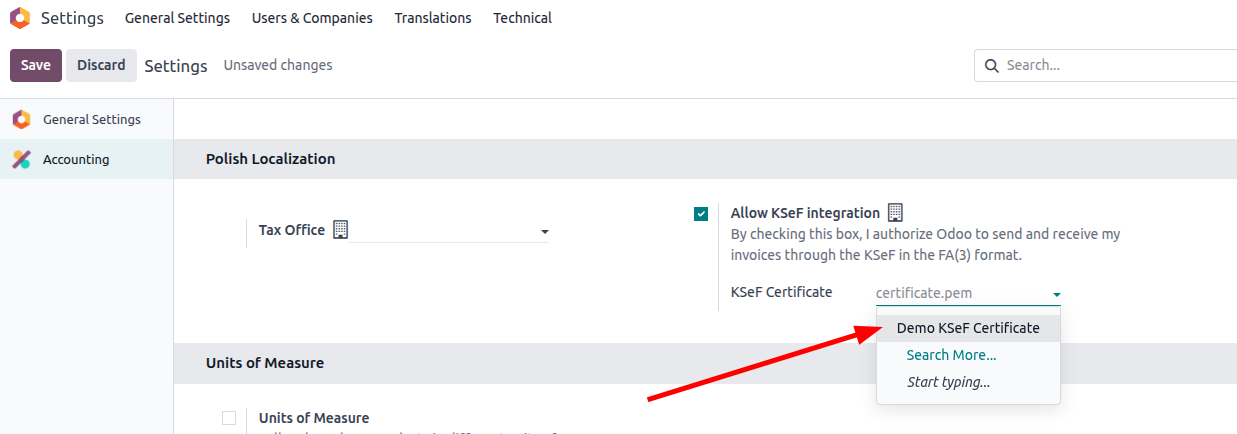
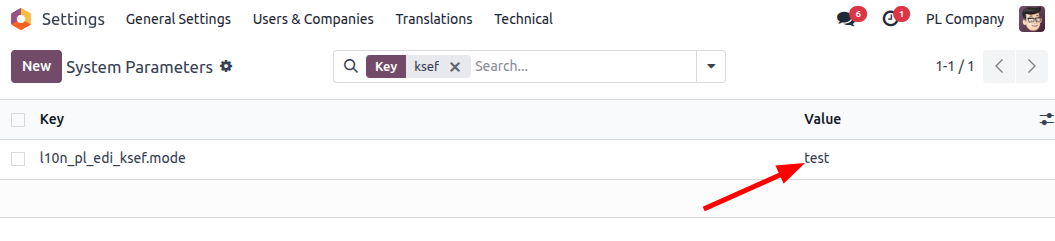
Step 8. Optional. You can connect your database with different KSeF environments (like test and pre-production). To set it up you need to go to Settings > Technical > System Parameters.
Now set a system parameter by clicking "New" button and provide following key: l10n_pl_edi_ksef.mode and one of the following values.
-
test - It will connect to the KSeF test environment. -
demo - It will connect to the KSeF demo (pre-production) environment. -
prod - It will connect to the KSeF production environment.
If this key is not present in your database, Odoo will always connect to the production environment.
🚀Sending invoices to KSeF
How to send an invoice to KSeF?
Step 1. Turn on the option to permit sending to KSeF. If this option is turned off, Odoo will only be able to retrieve bills. 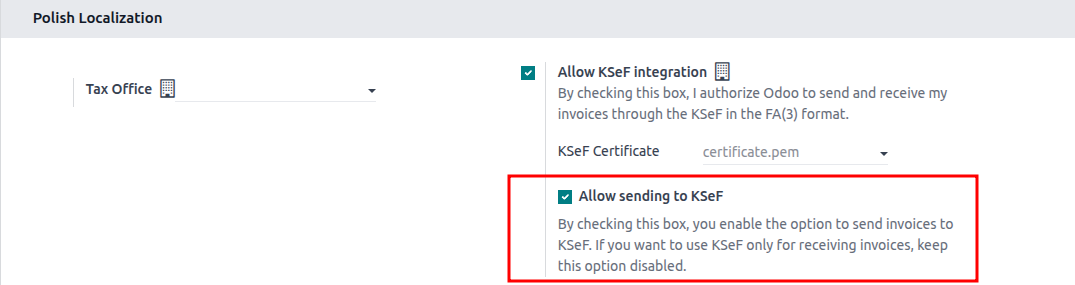
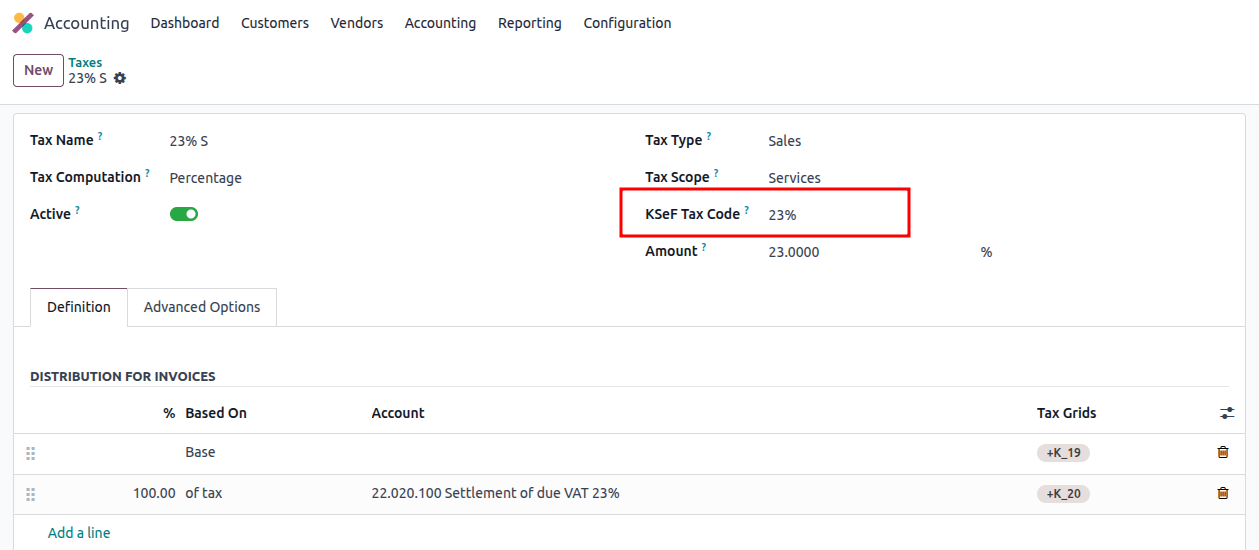
Step 2. Before you start to send invoices, make sure you have the right KSeF tax codes selected in the tax configuration. All 0% taxes have to be mapped manually based on the accountant's knowledge.
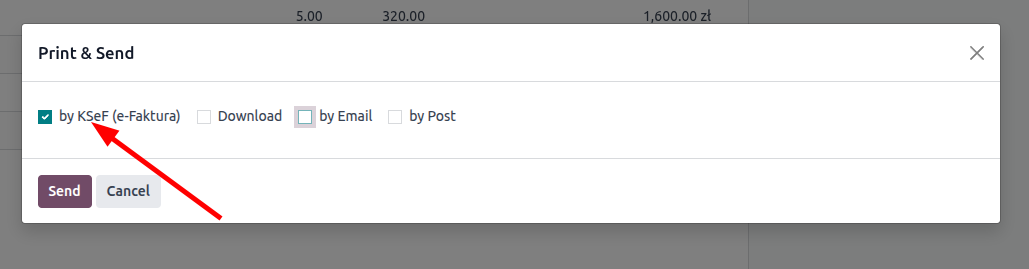
Step 3. In order to send an invoice to KSeF, you must have a confirmed invoice. Click the Send button and choose the option by KSeF (e-Faktura).
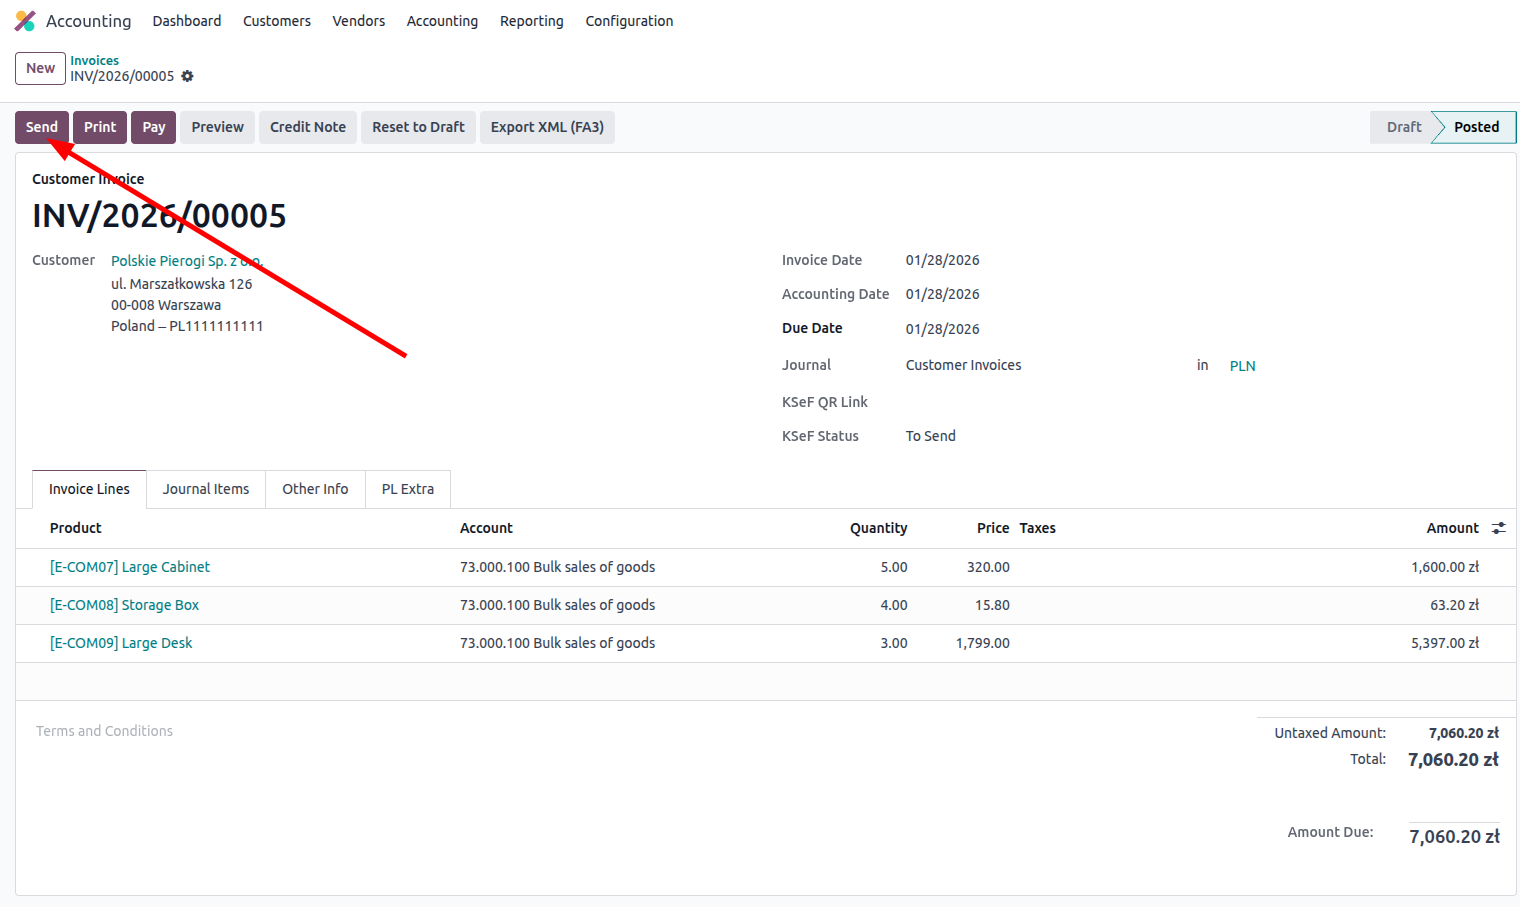
After the invoice is sent to KSeF, you will see a green banner with information that KSeF accepted our invoice, and the KSeF number is visible on the right side.
After sending it might happen that you can see a Check Sending button and the warning banner. It means our invoice has been successfully sent, but KSeF needs some time to process and register our invoice. You can wait until the scheduled action checks the status of all sent invoices, or you can use Check Sending to check right away. In most of the cases KSeF should be able to return status without clicking anything.
In case of an error, you will see a banner with information and the comment in the chatter that describes what went wrong.
Additional options:
- UPO
- Invoice visualization
Option 1. After invoice is sent to KSeF, you can download UPO.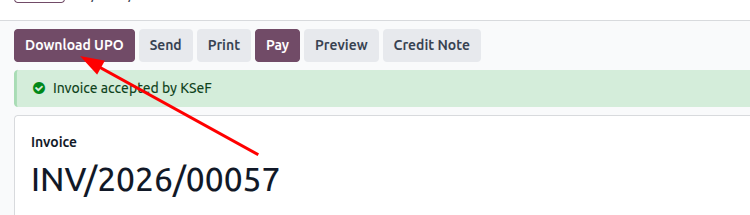
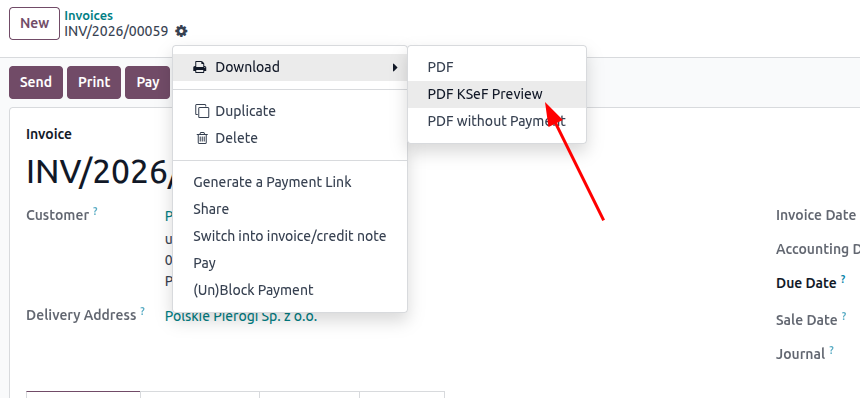
Option 2. If you want to be sure that the data on your invoice is correct, you can vizualize it before it is sent to KSeF. To do that open the posted invoice > click gear icon > Download > PDF KSeF Preview
Once downloaded, you can see that the document has a watermark on it and does not contain a KSeF number.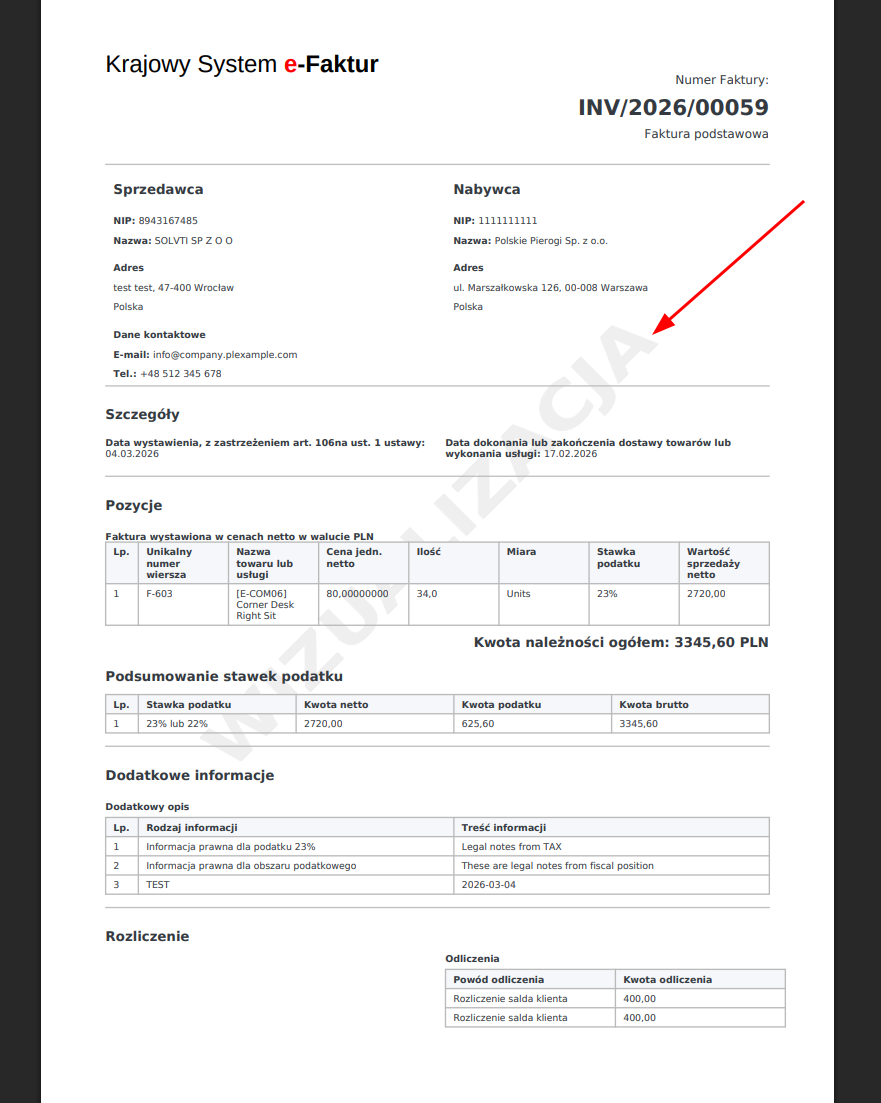
Odoo will use data from the invoice and related object to use them on the KSeF invoice. For example, terms and conditions will be displayed as additional info on the KSeF invoice. 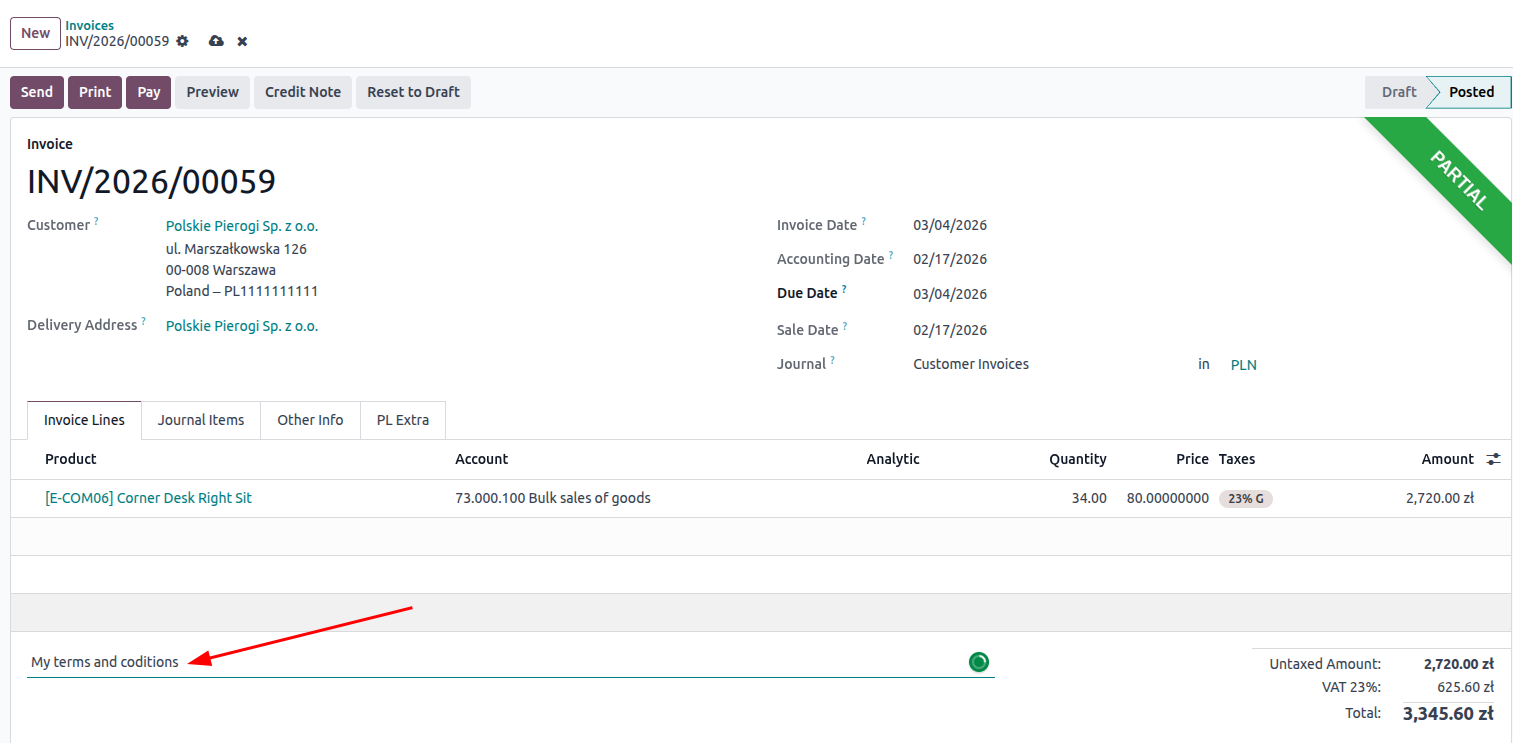
Other information like legal notes from taxes and fiscal positions will also be included.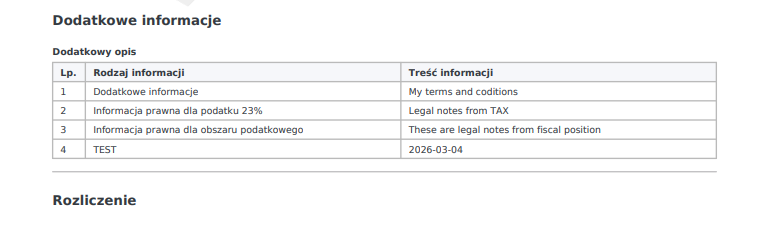
If you need any additional info on your invoice, you might use a special field on the company to create a dictionary of keys and values that will be displayed on the invoice.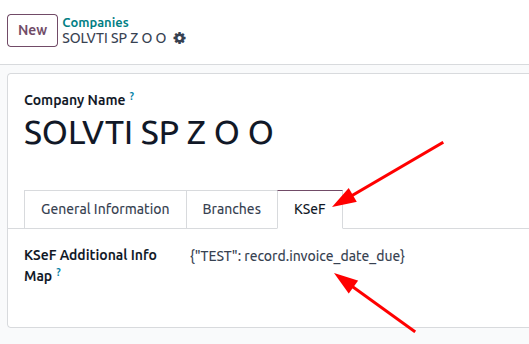
Additional example (multiple values):
You should always separate the rows with a comma and follow the below structure:
{"TEST":record.invoice_date_due, "Payment terms": record.invoice_payment_form_id, "Recipient bank": record.recipient_bank_id}
📥Fetching Bills From KSeF
Odoo retrieves invoices from KSeF automatically through a scheduled action that executes every hour, collecting any new invoices.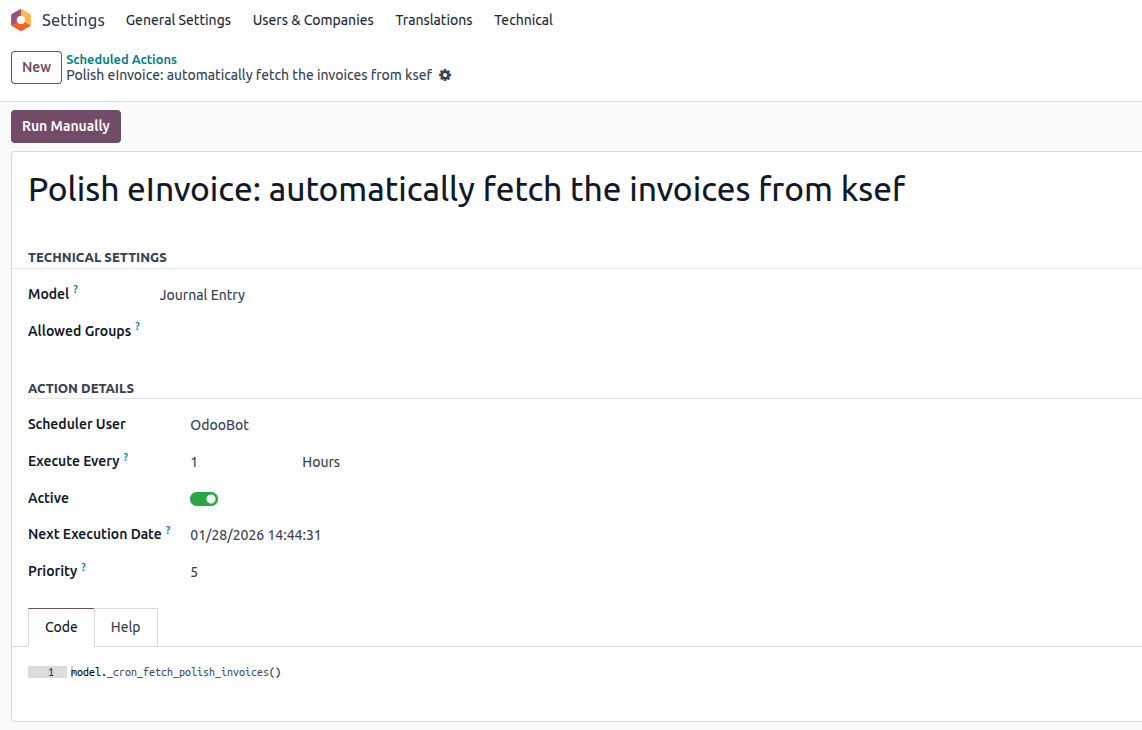
KSeF has a limitation of 15 invoices that can be fetched per minute. If you want to download more invoices at once, you will need to wait until Odoo does several rounds of fetching. You can change the execution interval on scheduled actions if you need to download more invoices at the time.
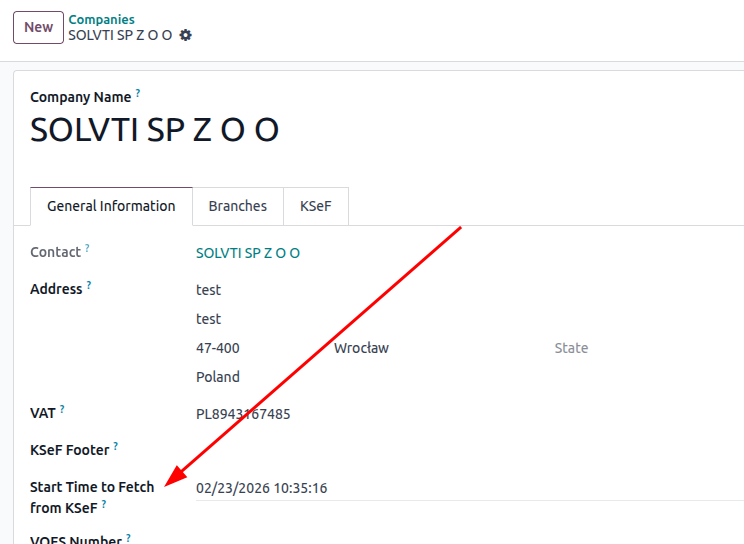
Odoo, by default, attempts to retrieve invoices from up to 80 days ago. If we need to access invoices older than that, we must configure a dedicated field in company settings and set a date to the desired one.
You can see your bills in the Purchase Journal. 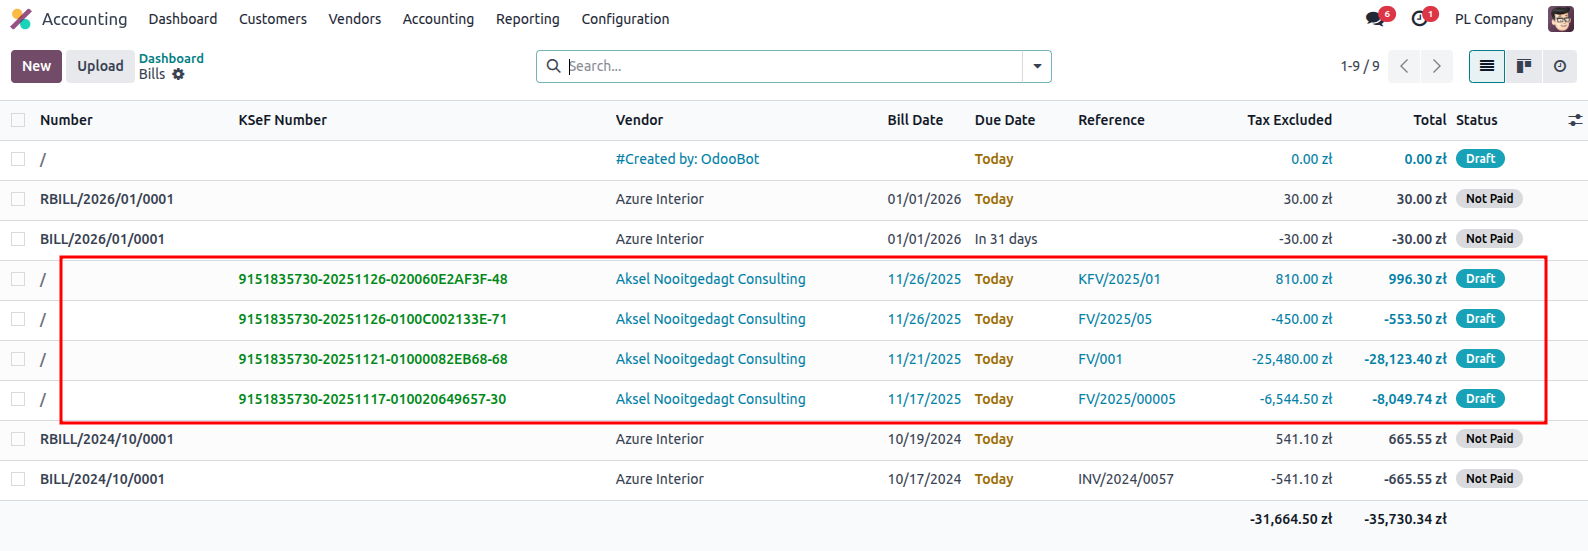
If you ha manually by drag and drop or the upload button. Odoo will recognize the format and will create a new bill with proceve your invoice in the form of XML, you can also upload itssed data.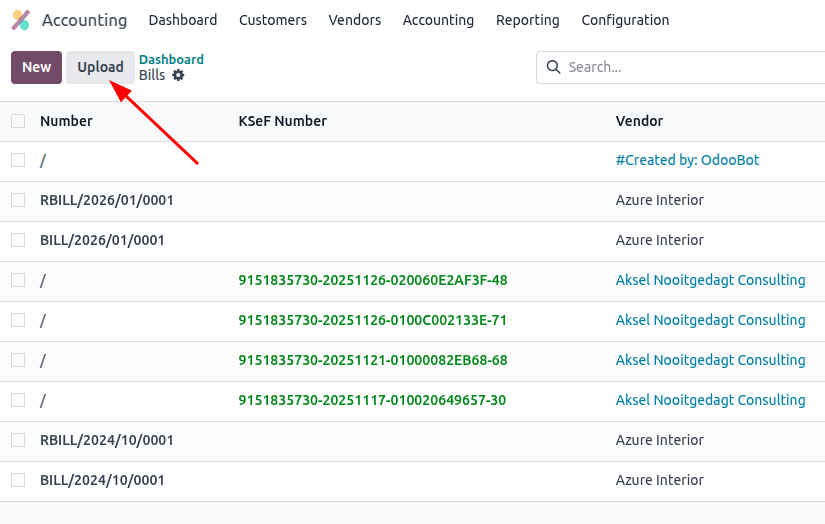
The visualization that you can see attached to the bill is generated by Odoo. 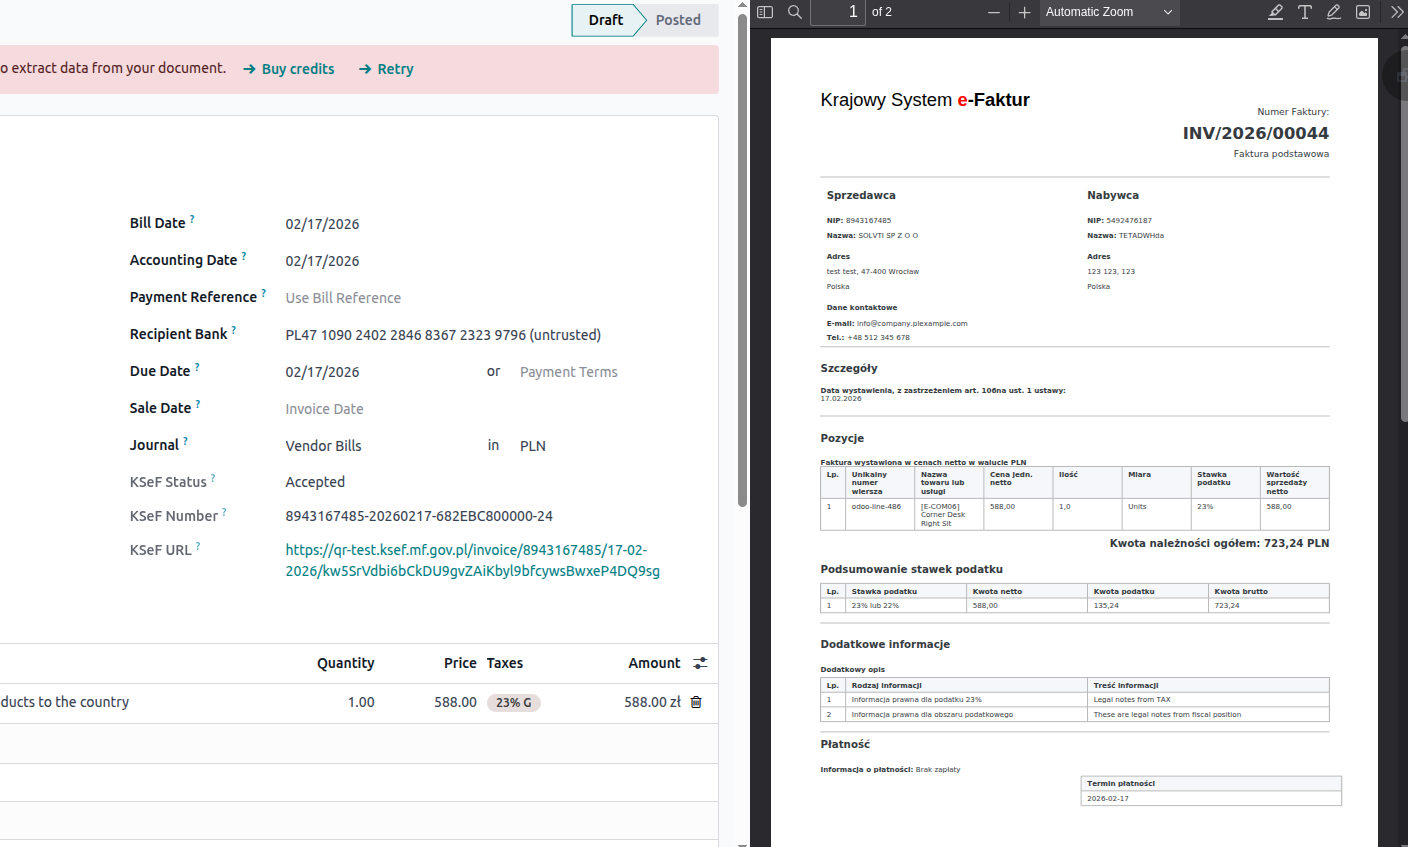
🔄Correction invoices in KSeF
To create a credit note, you need to use our special correction invoice type. Click Credit Note and use the Correction option. 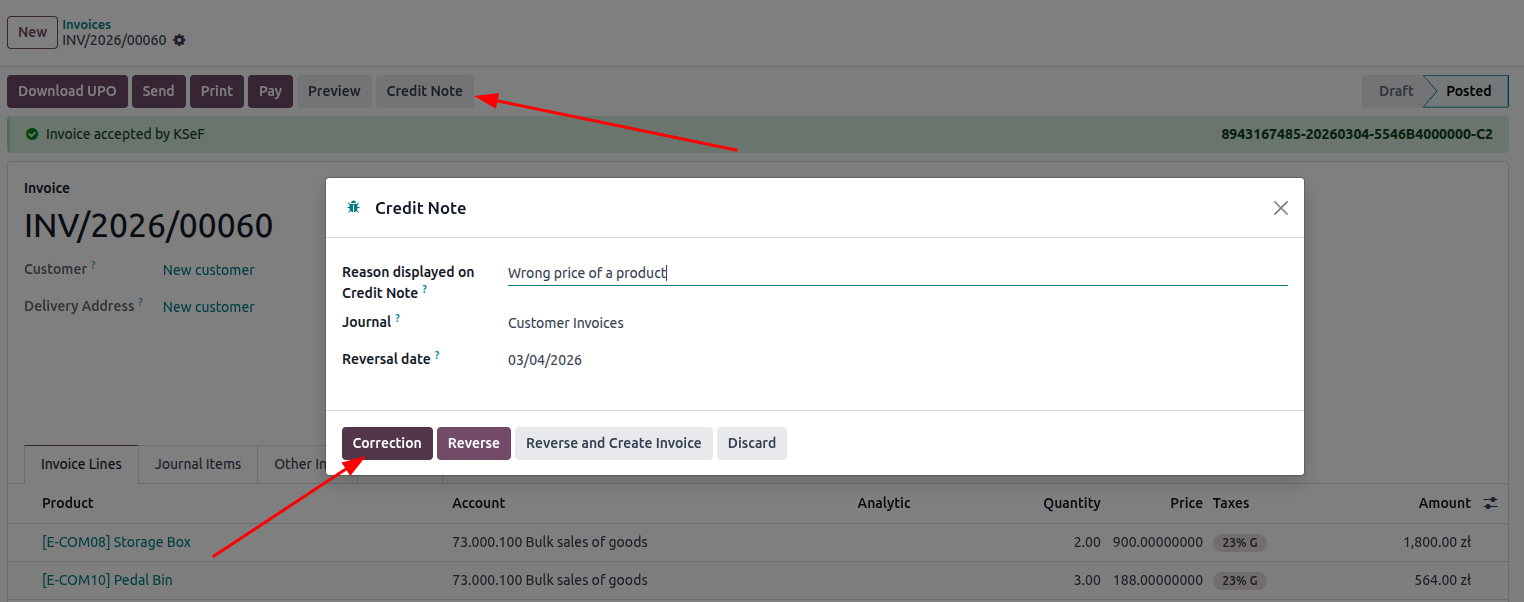
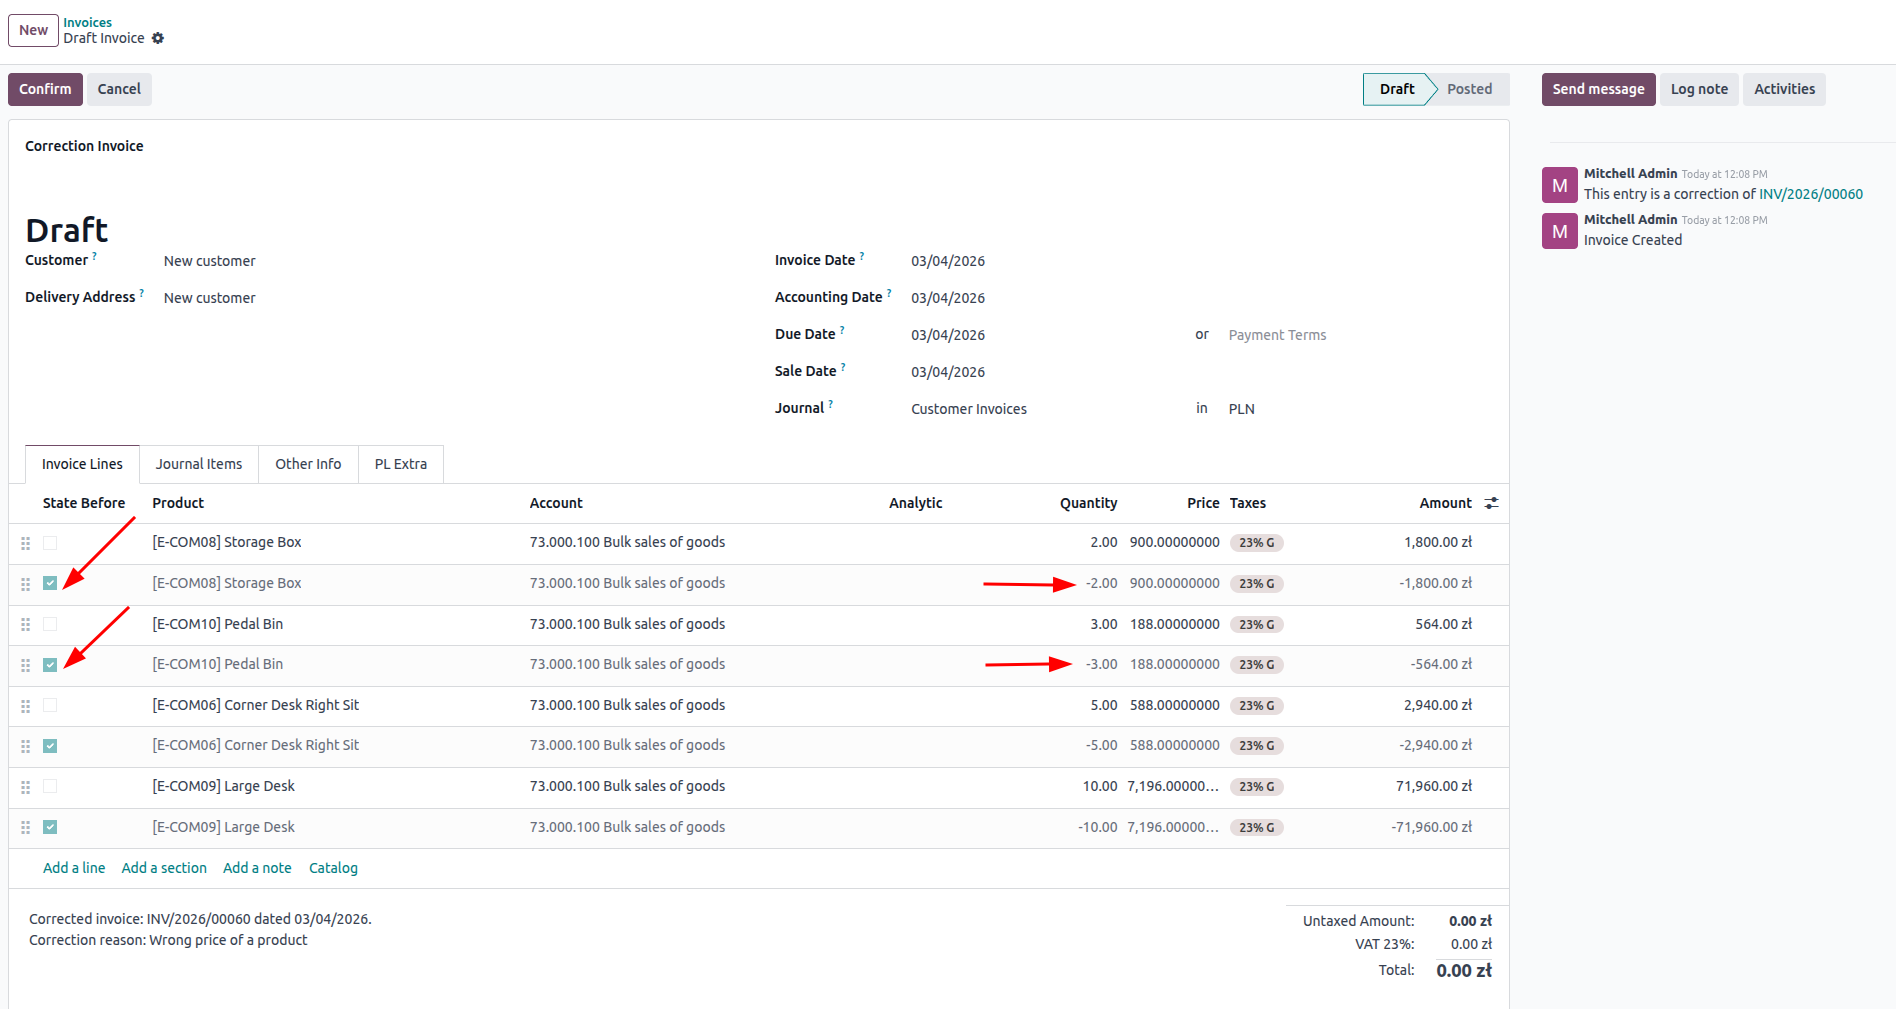
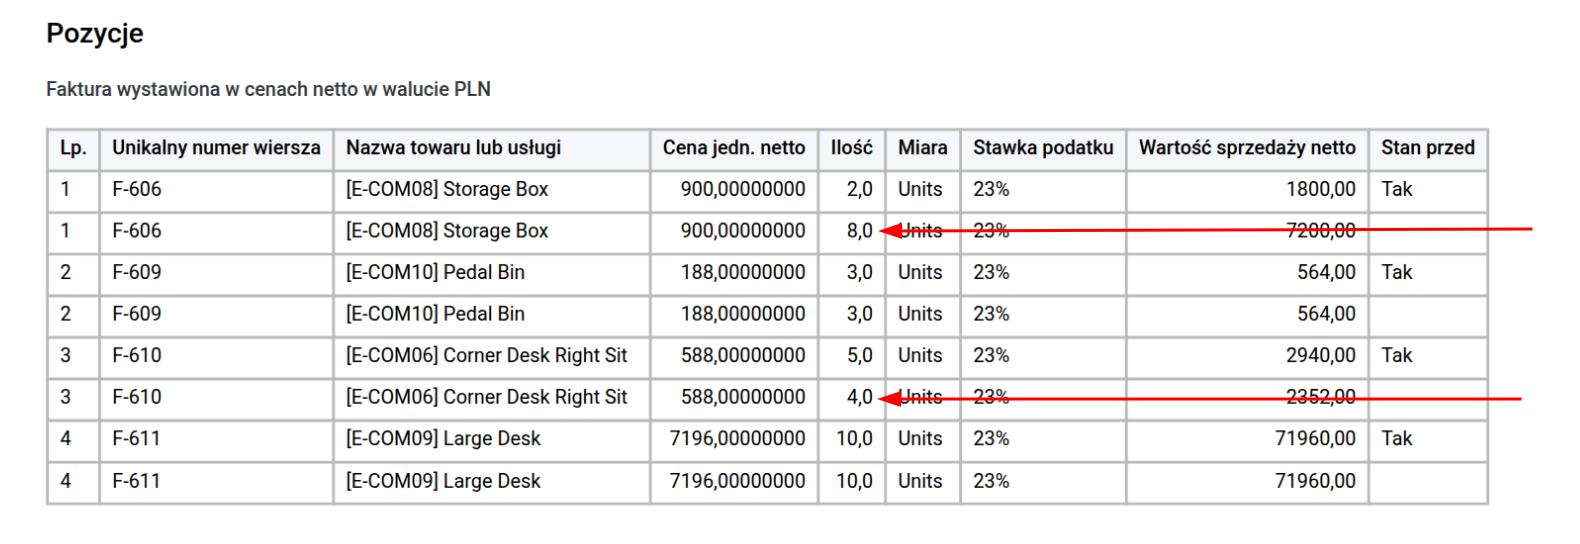
To correct the amount or anything related to the lines, you need to set a state after on the line, which corresponds to the line before. You always want to get the final version of the line, not the difference.
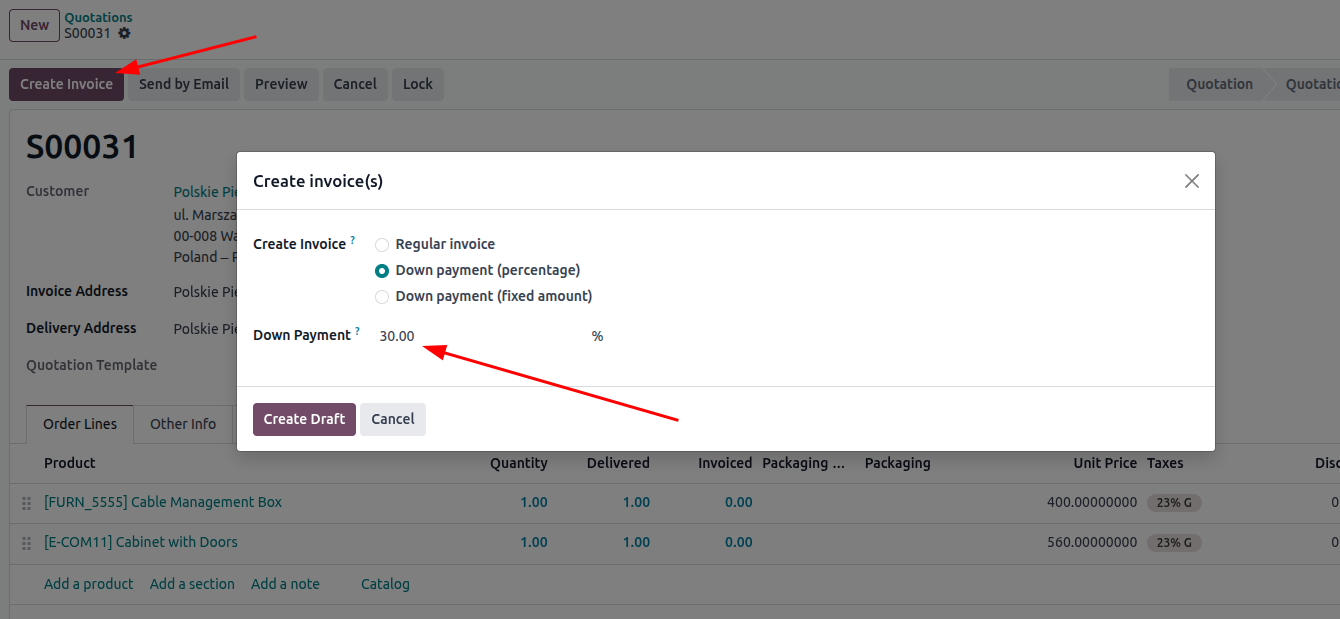
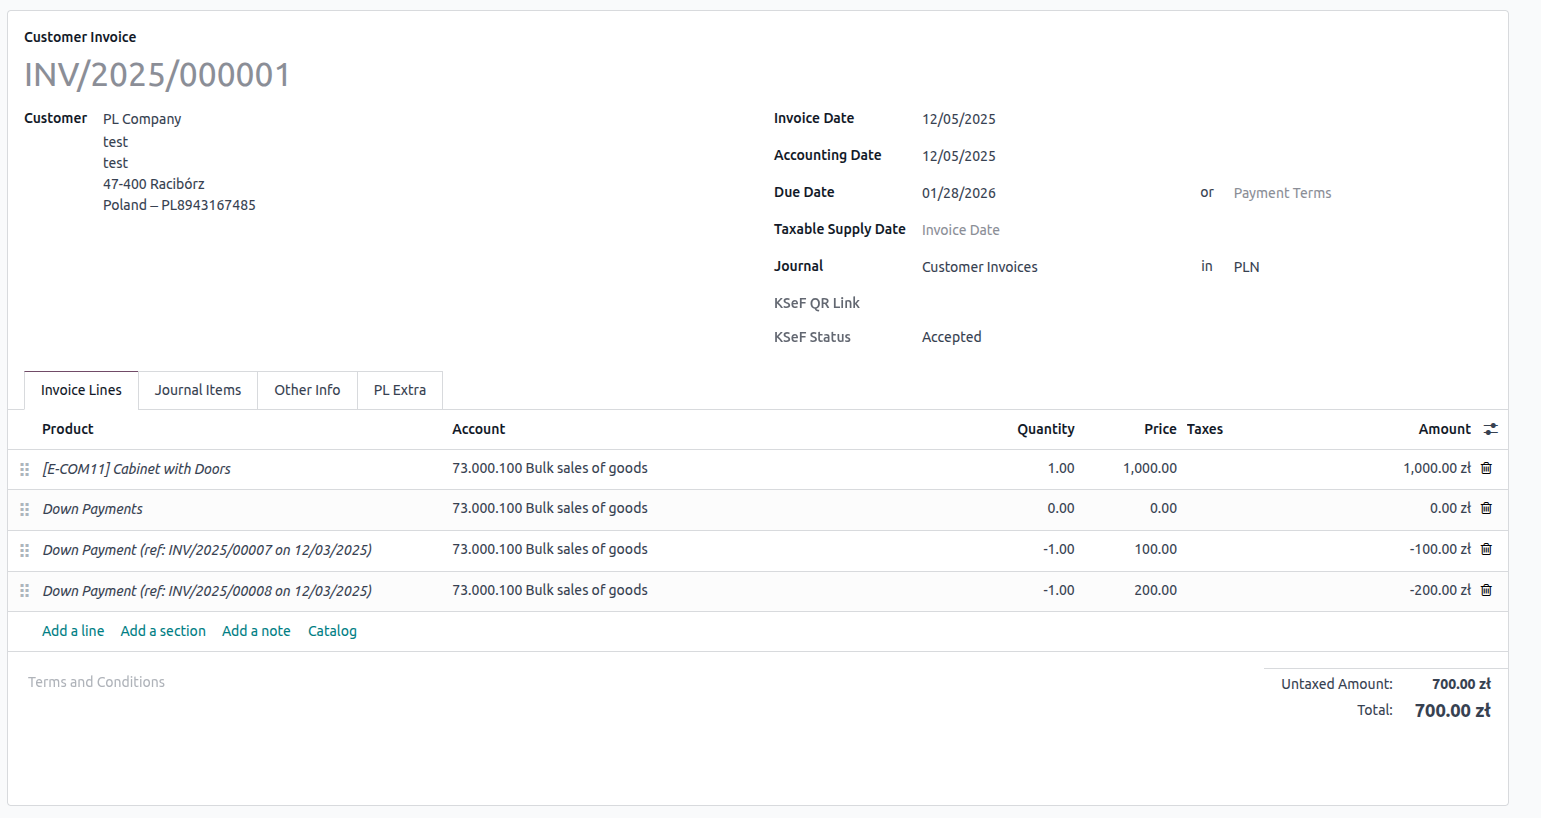
✅Down Payment invoices in KSeF
To send a down payment invoice, you need to open a sale order and choose Down payment from the multiple choice list during standard invoice creation.